Crafter Marker Light Replacement Bracket - Blank Plate
Crafter Marker Light Replacement Bracket - Blank Plate
Couldn't load pickup availability
Side Marker Light Adapter for VW Crafter & MAN TGE – Closes the hole left when removing the OEM marker lights so you can replace them.
Pack of 6
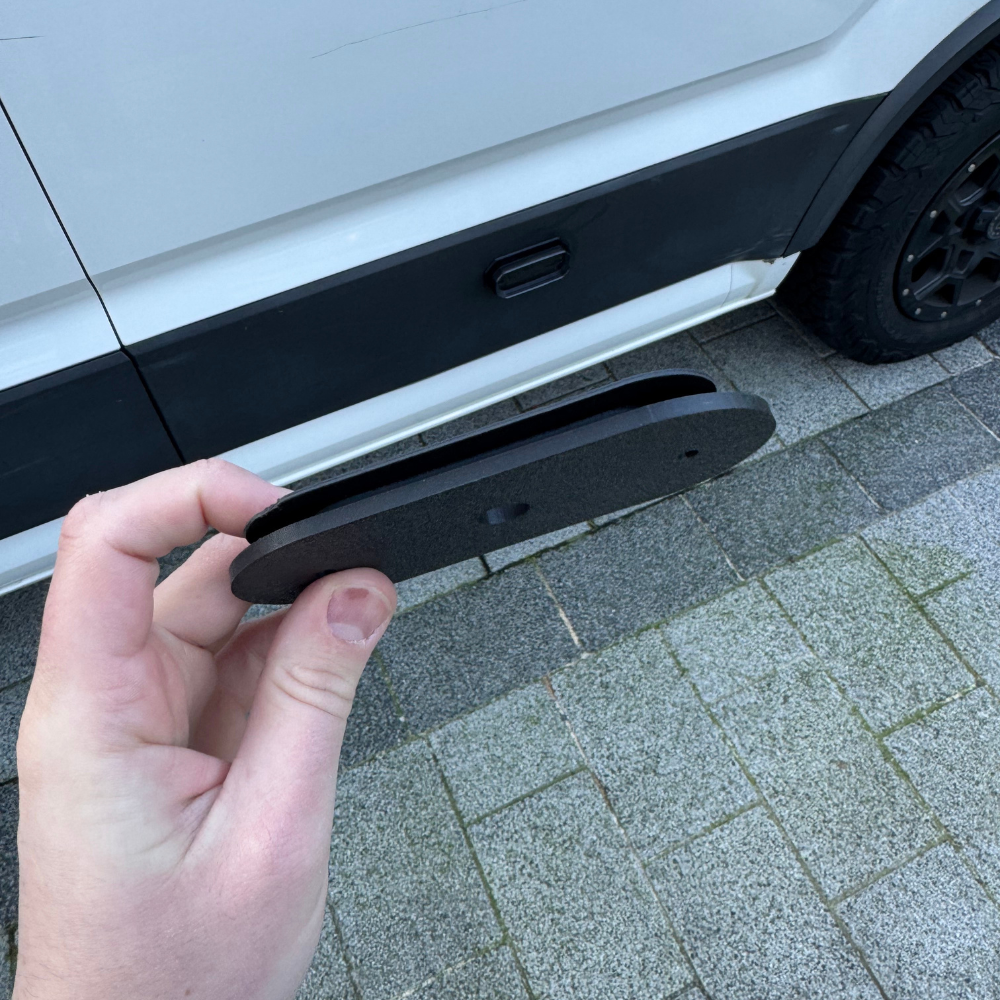
This version is a blank front plate that covers the hole left when removing the OEM lights and has a blank plate that faces the outside so you can attach any new marker lights. We offer a version that fits the Strands FOR9T Scale Position Marker Light here.
Upgrade Your Van with Better Side Lights: Designed for the VW Crafter and MAN TGE, this adapter fills the gap left when removing the OEM side marker lights. It provides a secure and professional-looking solution for fitting new marker lights to the Crafter or MAN TGE, ensuring a clean, factory-like finish. The black plastic matches the bumper trim. The blanking plate is oval to fit into the design of the van.
Tough & Weatherproof: Crafted from high-durability plastic, this adapter is built to withstand harsh conditions. It's weatherproof, ensuring long-lasting performance in all environments - from everyday driving to extreme weather. The plastic is both durable and slightly flexible, providing resilience against bumps and knocks while maintaining its colour over time.
Compatible with: VW Crafter (2017-2025) and MAN TGE (2017-2025) and VW Crafter (2011 - 2016)
You get 6: Enough for the 3 down each side of the van. All the holes in the bumpers are the same size, so you get 6 inside and 6 face plates in this product.
Need Something More Custom? We can adapt this design to suit your needs. Just drop us an email with your requirements, and we’ll get back to you.
Easy Installation: Simply remove the old light and any residual foam tape. Then:
1. Place the back bracket behind the bumper and the front plate on the other side.
2. Align the front and back parts around the bumper, and push them together until they click. The fit is intentionally tight to prevent loosening, so some force is required.
3. Drill two pilot holes through the bumper using the holes in the bracket as a guide, ready for your screws.
4. Feed the cable through the provided hole and secure everything with screws. The back plate is solid fill and your pilot hole will ensure it lines up correctly. Don't overtighten the screws, as this may cause them to loosen over time. Tighten them just enough for a firm hold.
For a waterproof, removable connection behind the bumper, we recommend using an outdoor automotive connector kit from Amazon.
Watch our installation videos above to see how it works.
Dimensions:
Centre hole for cable: 13mm diameter
Screw receiver blocks: 15mm x 15mm x 12mm (depth)
External depth of plate from bumper outwards: 4mm
External oval shaped plate: 132.5mm (w) x 60mm (h) x 4mm (d). Circle right/left side diameter 30mm.
Distance between screw holes: 90mm.
Share